
รูป 1: แสดงการโหลดโปรแกรม boot loader จากอุปกรณ์ไปยัง memory
รูป 1: แสดงการโหลดโปรแกรม boot loader จากอุปกรณ์ไปยัง memory
จาก foreward ในหนังสือข้างต้น ได้เขียนสิ่งที่น่าสนใจดังนี้
Boot sector ในระบบที่เข้ากันได้กับ IBM ถูกออกแบบมาเพื่อเก็บโค้ดและข้อมูลขนาด 510 ไบต์ (2 ไบต์สุดท้ายเป็นลายเซ็นสำหรับตรวจสอบความถูกต้อง) ซึ่งเพียงพอสำหรับการระบุตำแหน่งและโหลดขั้นตอนถัดไปของการบูตเครื่อง สำหรับดิสก์ DOS มาตรฐาน โค้ดจะทำหน้าที่แยกวิเคราะห์ระบบไฟล์ FAT12 เพื่อตรวจหาไฟล์ชื่อ IBMBIO.COM หรือ IO.SYS และ IBMDOS.COM หรือ MSDOS.SYS จากนั้นจะโหลดไฟล์ IBMBIO.COM หรือ IO.SYS (ซึ่งจะโหลดไฟล์ IBMDOS.COM หรือ MSDOS.SYS ต่อไป) มีพื้นที่เหลือใน boot sector น้อยมากสำหรับการแสดงข้อความผิดพลาดโดยละเอียด หากไม่พบไฟล์ดังกล่าว ระบบที่ไม่ใช่ DOS สามารถทำการเข้าถึงดิสก์โดยตรงหรือแยกวิเคราะห์ระบบไฟล์ของตนเองได้ แต่ข้อจำกัดด้านขนาดก็ยังคงอยู่
ด้วยข้อจำกัดของสภาพแวดล้อมดังกล่าว บ่อยครั้งที่ boot sector ถูกมองข้ามว่ามีหน้าที่อื่นนอกเหนือจากการบูตระบบ อย่างไรก็ตาม ตลอดหลายปีที่ผ่านมา มีคนสองกลุ่มที่ค้นพบการใช้งานทางเลือกสำหรับมัน กลุ่มหนึ่งคือ นักเขียนไวรัส และอีกกลุ่มคือ ผู้สร้างเดโม (demo maker)
นักเขียนไวรัสสร้าง ไวรัสบูตเซกเตอร์ ที่จะทำงานเมื่อดิสก์ที่ติดเชื้อถูกบูตขึ้นมา โดยจะอาศัยอยู่ในหน่วยความจำและแพร่เชื้อไปยังฟล็อปปี้ดิสก์อื่น ๆ ที่ใส่เข้าไปในไดรฟ์ ไวรัสบูตเซกเตอร์มักจะคัดลอก boot sector ดั้งเดิมไปยังตำแหน่งอื่นบนดิสก์ จากนั้นจึงแทนที่โค้ดดั้งเดิมด้วยโค้ดเฉพาะของไวรัส
ไวรัสบูตเซกเตอร์ยุคแรก ๆ จะคัดลอก boot sector ดั้งเดิมไปไว้ที่ท้ายดิสก์ โดยหวังว่าจะไม่มีการใช้งานพื้นที่นั้นอยู่แล้ว เทคนิคนี้ไม่ได้ถูกใช้นานนัก เพราะการบูตฟล็อปปี้ดิสก์ที่ติดเชื้อดังกล่าวจะมีความล่าช้าที่สังเกตได้และมีเสียงผิดปกติขณะที่หัวอ่านไดรฟ์เคลื่อนไปยังท้ายดิสก์แล้วกลับมาเพื่อดำเนินการโหลดต่อ
เทคนิคการแทนที่นี้อาศัยข้อเท็จจริงที่ว่าดิสก์ DOS ทั่วไปมี สำเนาของ File Allocation Table (FAT) สองชุด โดยชุดหนึ่งอยู่ถัดจากอีกชุดหนึ่งทันที และทั้งสองชุดอยู่ในแทร็กแรกของดิสก์ สำเนา FAT ชุดแรกจะถูกใช้เป็นเวอร์ชันหลัก ส่วนชุดที่สองเป็นสำรองที่ในบางกรณีสามารถใช้กู้คืนไฟล์ที่ถูกลบและการซ่อมแซมข้อผิดพลาดของดิสก์บางอย่างได้
นักเขียนไวรัสตัดสินใจว่าสำเนาสำรองของ FAT จะไม่ถูกใช้งานบ่อยนัก และถือว่าสำเนานั้นเป็นพื้นที่ว่าง นั่นกลายเป็นที่สำหรับเก็บ boot sector ดั้งเดิม พร้อมกับโค้ดเพิ่มเติมที่ไวรัสต้องการเป็นขั้นตอนที่สอง การใช้ตำแหน่งนี้ช่วยหลีกเลี่ยงการเคลื่อนที่ของหัวอ่านไดรฟ์ระหว่างการบูต ทำให้การบูตดูคล้ายกันมากระหว่างดิสก์ที่ไม่ได้ติดเชื้อกับดิสก์ที่ติดเชื้อ
เมื่อฮาร์ดดิสก์แพร่หลายมากขึ้นและมีความจุมากขึ้น มักจะถูก “พาร์ติชัน” ออกเป็นส่วน ๆ ตามวัตถุประสงค์เฉพาะ หรือเพื่อหลีกเลี่ยงข้อจำกัดของคำอธิบายความจุของดิสก์ใน BIOS พาร์ติชันสามารถช่วยให้มีระบบมัลติบูตได้ — หนึ่งสภาพแวดล้อมต่อหนึ่งพาร์ติชัน แต่ละพาร์ติชันมี boot sector ของตัวเองที่รู้วิธีการแยกวิเคราะห์รูปแบบของข้อมูลในพาร์ติชันนั้น
นักเขียนไวรัสมักจะเล็งเป้าไปที่ Master Boot Record (MBR) ของฮาร์ดดิสก์ แทนที่จะเป็น boot sector ของแต่ละพาร์ติชัน MBR ใช้เพื่อเลือกพาร์ติชันที่สนใจและส่งการควบคุมไปยัง boot sector ของพาร์ติชันนั้นเพื่อบูตเนื้อหาของพาร์ติชันนั้น ดังนั้นจึงเป็นโค้ดแรกที่ทำงานและถูกเรียกใช้งานเสมอ ในทางตรงกันข้าม boot sector ของพาร์ติชันอาจถูกเรียกใช้งานไม่บ่อยนัก หรืออาจไม่ถูกเรียกเลยหากพาร์ติชันนั้นใช้รูปแบบดิสก์เดียวกันกับพาร์ติชันอื่นที่ถูกบูตแทน ไวรัสใน MBR ยังคงสามารถแพร่เชื้อไปยังฟล็อปปี้ดิสก์ได้เมื่อใส่เข้าไปในไดรฟ์ฟล็อปปี้
ไวรัสบูตเซกเตอร์แพร่กระจายอย่างอิสระและกว้างขวางในหมู่ดิสก์ละเมิดลิขสิทธิ์ เนื่องจากดิสก์ที่คัดลอกมามักจะไม่ได้ถูกป้องกันการเขียน พวกมันคงอยู่จนกระทั่งฟล็อปปี้ไดรฟ์เลิกผลิตพร้อมกับพีซีเครื่องใหม่ ถึงกระนั้น MBR ก็ยังคงมีอยู่ ในปี 2019 ที่ผู้เขียนเขียนบทความนี้ BIOS ในพีซีที่เข้ากันได้กับ IBM ยังคงมีโค้ดที่อนุญาตให้ระบบบูตจาก MBR ได้
Peter Ferrie
Distinguished Engineer.
Symantec Corp.
July 24, 2019
A boot-sector in an IBM-compatible environment is intended to hold 510 bytes (the last two bytes being a signature for validation) of code and data sufficient to locate and load the next stage for the boot. For a standard DOS disk, the code would parse the FAT12 file-system in order to detect the presence of the files named IBMBIO.COM or IO.SYS, and IBMDOS.COM or MSDOS.SYS, and then to load IBMBIO.COM or IO.SYS file (which in turns loads the IBMDOS.COM or MSDOS.SYS file). There was very little spare space in the boot sector for a detailed error message if either file could not be located. Non-DOS systems were free to perform direct disk activity or parse their own file-systems, of course, but the size limit remained.
Given such a constrained environment, it’s often overlooked as a target for a function other than booting the system. However, over the years, two particular groups of people found alternative uses for it. One group was the virus writer. The other group is the demo maker.
Virus writers created “boot-sector” viruses that activated when the infected disk was booted, resided in memory, and then infected other floppy disks as they were inserted into the floppy drive. It was common for bootsector viruses to copy the original boot-sector to another location on the disk, and then to replace the original code with the virus-specific code. Early boot-sector viruses would copy the original boot-sector to the end of the disk, hoping that it was not in use already. This technique was not used !vfor very long because booting such an infected floppy disk would have a noticeable delay and unusual sound while the drive arm moved to the end of the disk and then back again to resume loading.
The replacement technique relied on the fact that regular DOS disks carry two copies of the File Allocation Table (FAT), one immediately after the other, and both within the first track of the disk. The first copy of the FAT is used as the master version. The second is a back-up which can in some cases enable undeletion of files and repair of certain disk errors. Virus writers decided that the back-up copy of the FAT would not be used very often, and claimed the copy as free space. That became the location for storing the original boot-sector, along with any additional code that the virus needed as its second stage. Using this location avoided the drive arm movement during the boot, making the boot seem very similar between an uninfected disk and an infected one.
As hard disks became more common and larger capacity, they were often “partitioned” into sections with particular purposes, or to avoid a limitation of the BIOS disk-capacity description. The partitions could allow multi-boot systems – one environment per partition. Each of the partitions carried its own boot sector which knew how to parse the format of the data in its partition. Virus writers often targeted the hard disk’s Master Boot Record (MBR) rather than the boot sector of individual partitions. The MBR is used to select the partition of interest and then to pass control to that partition’s boot sector to boot the contents of that partition, so it is the first code that runs, and it is always executed. In contrast, a partition’s boot-sector might be executed only rarely, or potentially not at all if the partition shares the same disk format as another partition which is booted instead. A virus in a MBR could still infect floppy disk as they were inserted to the floppy drive.
Boot-sector viruses spread freely and widely among pirated disks, since it was not common for a copied disk to be write-protected. They survived until floppy drives ceased to be shipped with new PCs. Despite that, the MBR lives on. As I write this in 2019, the BIOS in IBM- !vicompatible PCs still carries the code to allow a system to boot from the MBR.
That leaves the demo maker. For almost as long as there have been computers, there have been demos (short for demonstration programs) for computers. As hardware improved in speed and capability, the size of demos increased as more assets could be manipulated and take advantage of what was offered. Many demos moved from real-time generation of objects with tracked music, to essentially videos with pre-generated textures and MP3 music of multiple-megabytes in size. However, there has always been smaller groups of demo makers who target older machines or older environments.
The interest in size-coding has been heightened by demo competitions. PC 64kb competitions appeared in 1991, followed by Amiga 40kb competitions in 1992, and PC 4kb competitions in 1994. It wasn’t until 2012 that PC 1kb competitions appeared. 1kb files are still suitable for Windows environments, or an Amiga boot-block. Sub-1kb competitions are effectively limited to a .COM file in the DOS environment, which presents some difficulties to get them to run on modern hardware. Conveniently, though, the DOS environment is a very close match to the MBR environment, the primary difference being the initial value of the segment registers and general-purpose registers. Thus, the MBR is the perfect place for a small demo which does not require booting DOS.
It might sound easy to target smaller file sizes, since there’s less code to write, but in fact it can be extremely challenging. The difficulty comes from the fact that such small programs are still expected to demonstrate amazing effects, so instead of taking the easy way and carrying huge assets, these small demos have to rely on coding tricks to generate visual elements on-the-fly. The smaller the program, the harder it gets.
So what can we do in an MBR? It turns out that it’s both a little and a lot. When the code in the MBR is executing, there is no operating system present. It means that there are no corresponding services offered, so we have no easy access to the GPU or the sound card or high-resolution video modes. Instead, we have only the most basic hardware support – there are !viibuilt-in functions to place text and pixels on the screen in various lower resolution video modes, read low-resolution timers, and read additional data from the disk (but that would be cheating). We can interact directly with the hardware, so we have access to high-resolution timers, and we can operate the speaker. From there, we can draw pictures and play music, so we can make demos.
In 510 bytes, we can display rotating flat-shaded vector balls, explore dot-vector landscapes, fly over cityscapes, be hypnotized by raster bars, zoom into fractals, or experience the illusion of movement created by color cycling… but wait! That’s not all. We can interact with the user. In short, we can make games! Not just any games, but good games. We can make variations of Tetris, Space Invaders, Puck-Man, Robotron, Snake… All in 510 bytes.
Peter Ferrie Distinguished Engineer. Symantec Corp. July 24, 2019

โหลดโปรแกรม NASM โดยโหลดที่ https://www.nasm.us/pub/nasm/releasebuilds/2.16.03/win64/nasm-2.16.03-installer-x64.exe
ติดตั้ง NASM
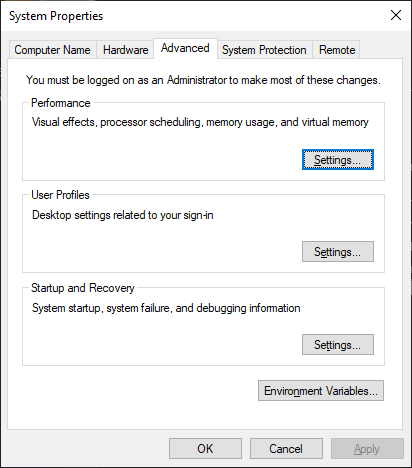
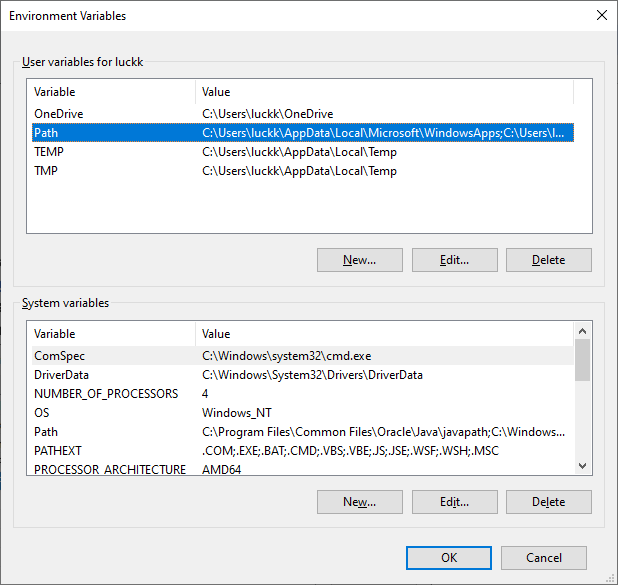
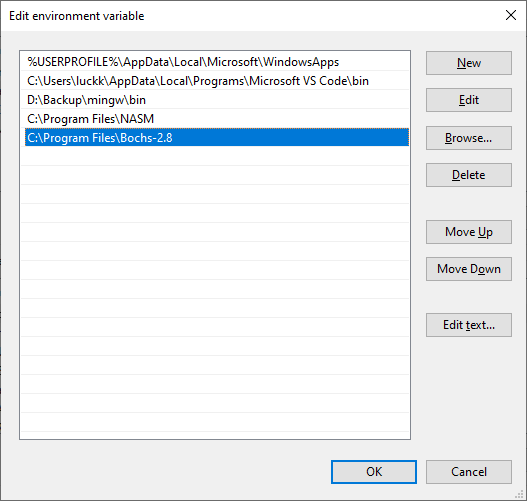
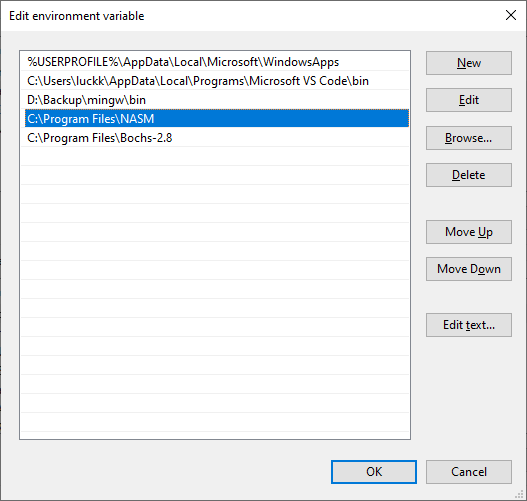
เพิ่ม path ของโปรแกรมไปใน environment variables
[org 7c00h] ; BIOS will load us to this addressmov ax, 0b800h ; Console memory is at 0xb8000 ; set up a segmentmov es, ax ; for the start of the console text.;; Let's clear the screen....;xor di, di ; Start at beginning of screenmov cx, 80*25 ; Number of chars in the screenmov al, ' ' ; Space charactermov ah, 0fh ; Color (white on black)repne stosw ; Copy!
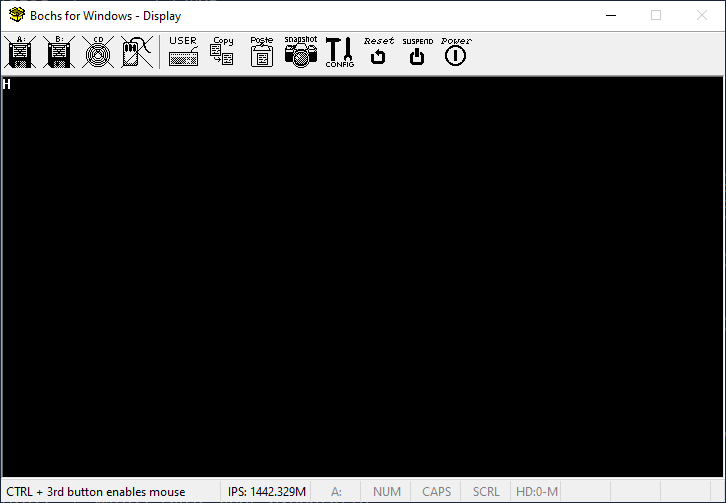
mov byte [es:0], 'H' ; Write an 'H'mov byte [es:1], 08ch
sleep:hlt ; Halts CPU until the next external ;interrupt is firedjmp sleep ; Loop forever
times 510-($-$$) db 0 ; Pad to 510 bytesdw 0aa55h ; Add boot magic word to mark us ; as bootable
นำโค๊ดด้านบนไปใส่ในไฟล์ boot.asm
compile ไปเป็น .bin ไฟล์
nasm -f bin boot.asm -o boot.binสร้างไฟล์ .bochsrc
ata0-master: type=disk, path="boot.bin", mode=flat, cylinders=1, heads=1, spt=1 boot: disk megs: 128กดรัน bochs + Enter
bochs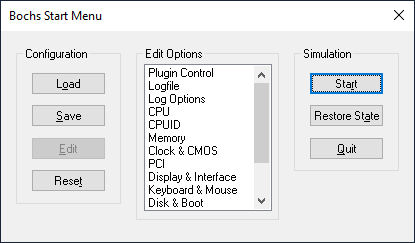
นำโค๊ดด้านบนไปใส่ในไฟล์ boot.asm
compile ไปเป็น .img ไฟล์
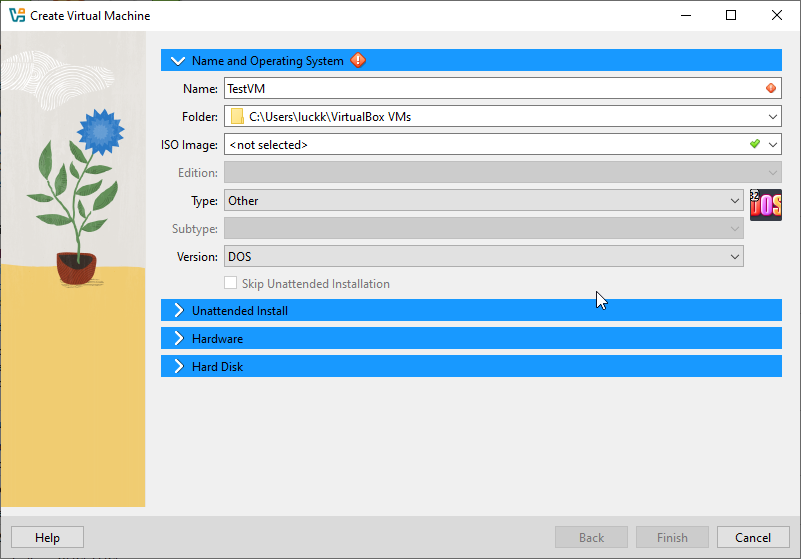
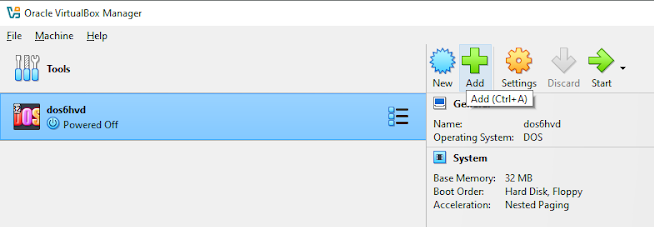
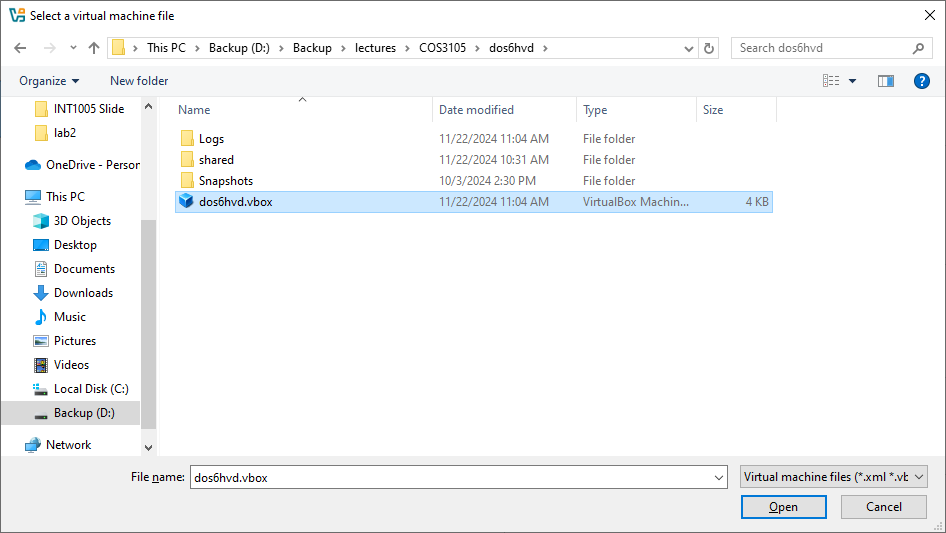
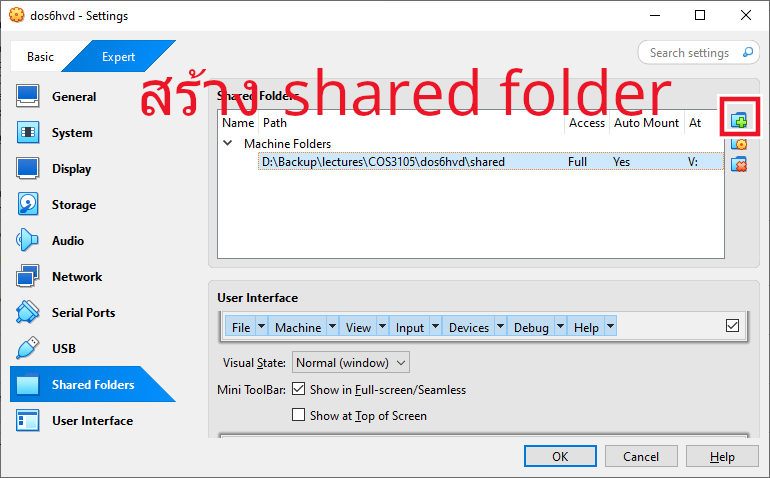
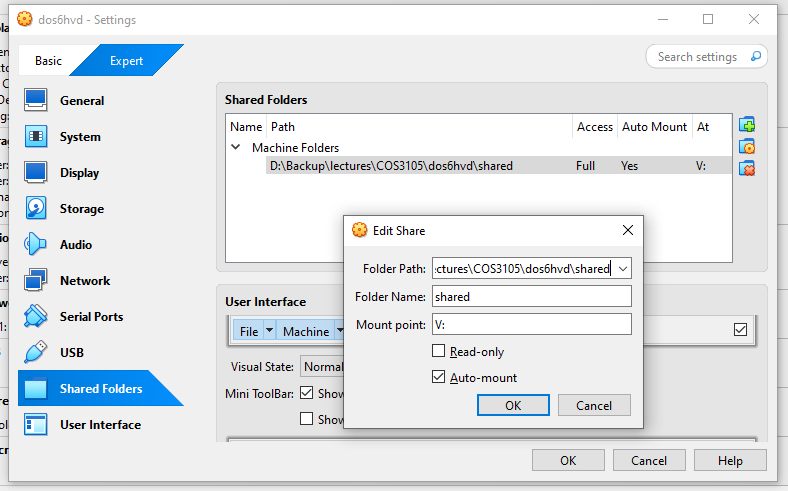
nasm -f bin boot.asm -o boot.imgสร้าง Virtual Machine ด้วย VirtualBox ตามรูป โดยเลือก Type เป็น Other และ Version เป็น DOS
เพิ่ม boot.img ลงใน floppy

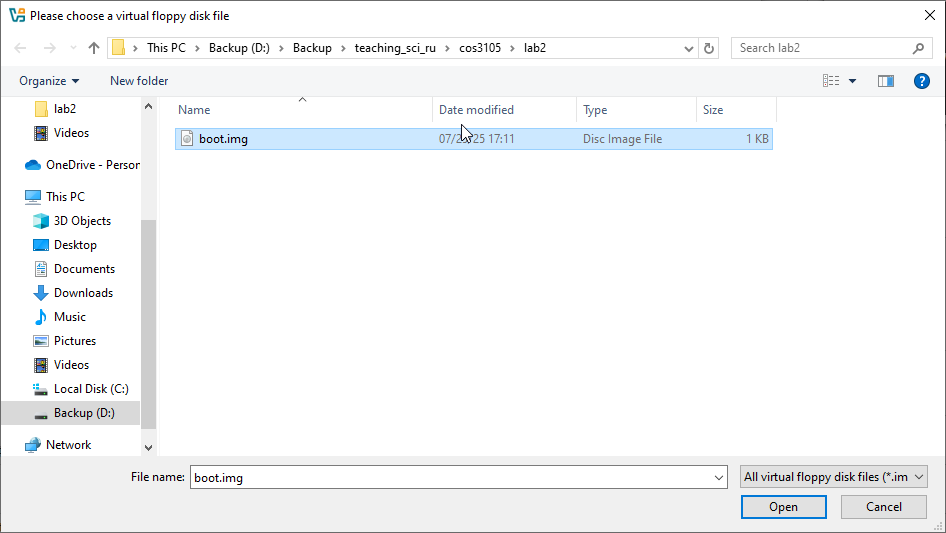
เลือกไฟล์ boot.img
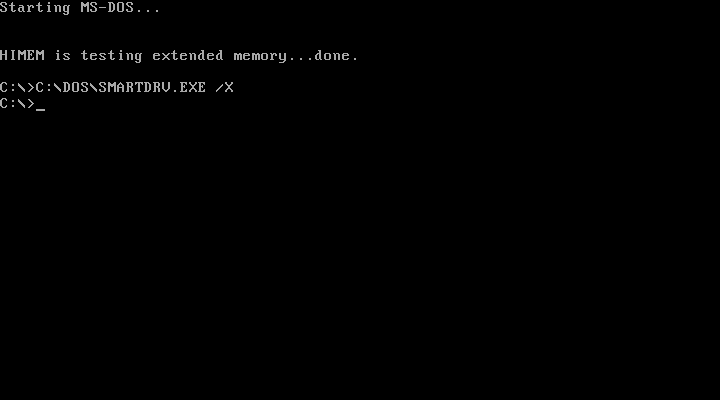
กด Run
p แล้วกด Enter
p แล้วกด Enterv แล้วกด Enter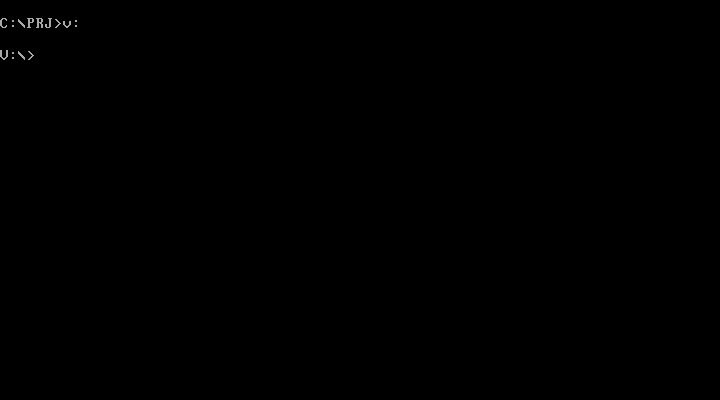
อ้างอิงจาก Assembly เบื้องต้น มหาวิทยาลัยราชภัฏสุราษฎร์ธานี หน้า 24
การเขียนโปรแกรม จำเป็นต้องเรียกใช้บริการที่ระบบปฏิบัติการเตรียมไว้ให้โปรแกรมประยุกต์เรียกใช้ บริการเช่นนี้เรียกว่า Application Programming Interface (API) หรือนิยมเรียกกันในกลุ่มผู้เขียนโปรแกรม ระบบ (System Programmer) ว่า System Call
บริการของระบบปฏิบัติการ MS-DOS ให้บริการผ่าน Software Interrupt ผู้เขียนโปรแกรมสามารถ เรียกใช้ได้ผ่านคำสั่ง INT ของหน่วยประมวลผลกลาง แต่รายละเอียดของบริการแต่ละอย่างต้องศึกษาจากคู่มือ ของระบบปฏิบัติการ MS-DOS
คำสั่ง INT – Generate Software Interrupt
รูปแบบการใช้งาน : INT หมายเลขของ Software Interrupt
คำอธิบาย คำสั่ง INT จะใช้หมายเลขของ Software Interrupt ที่ผู้เขียนโปรแกรมกำหนดให้เป็นดัชนีของตาราง ที่จัดเก็บตำแหน่งเริ่มต้น ( address) ของโปรแกรมย่อยที่ทำหน้าที่ตอบสนองต่อการ Interrupt ซึ่งเก็บไว้ใน หน่วยความจำที่เรียกว่า Interrupt Vector Table หรือ Interrupt Descriptor Table เมื่อได้ตำแหน่ง เริ่มต้นของโปรแกรมย่อยนั้นแล้วจะทำการส่งผ่านการทำงานโดยไม่มีเงื่อนไขไปยังตำแหน่งนั้น โปรแกรมย่อย ดังกล่าวนี้เรียกว่า Interrupt Service Routine หรือ Interrupt Handler ซึ่งจะให้บริการตามหมายเลข Interrupt ที่ร้องขอมาและเมื่อทำงานเสร็จแล้ว จะส่งผ่านการทำงานกลับคืนมายังจุดเดิม ทำให้สามารถทำงาน เดิมที่ค้างอยู่ต่อไปได้ เรื่องของ Interrupt
ระบบปฏิบัติการ MS-DOS ทำการสงวนหมายเลข Interrupt ระหว่าง 20H – 3FH ไว้สำหรับใช้งาน โดยกำหนดให้ Interrupt หมายเลข 20 H (INT 20) ให้บริการในการจบการทำงานของโพรเซส ซึ่งต้อง ดำเนินการหลายอย่างทั้งการกำหนดค่าที่จำเป็น การจัดการกับหน่วยความจำที่ใช้พักข้อมูลของแฟ้ม ( buffer) การปิดแฟ้มที่ยังเปิดค้างอยู่ สำหรับ Interrupt หมายเลข 21H (INT 21) แยกออกเป็นบริการย่อยอีกประมาณ 100 บริการ แต่ละบริการเรียกว่า MS-DOS function call โดยทำการกำหนดหมายเลขฟังก์ชันที่ต้องการใน รีจิสเตอร์ AH ก่อนเรียกใช้คำสั่ง INT 21H ในที่นี้จะกล่าวถึงเฉพาะบริการรับแสดงผลตัวอักขระหนึ่งตัวทาง อุปกรณ์นำข้อมูลเข้าและแสดงผลมาตรฐานก่อน
ตัวอย่าง System Call ที่เรียกผ่าน Library ของภาษา C
#include <stdio.h>int main(void) { printf("hello, world!\n"); //จะไปเรียก systemcall return 0;}ตัวอย่าง 1 - ใช้ได้เฉพาะ Linux อันนี้จะขึ้นอยู่กับระบบปฏิบัติการ unix เพียงอย่างเดียว
#include <unistd.h>int main(void) { write(1, "hello, world!\n", 14); return 0;}ตัวอย่าง 2 - ใช้ได้เฉพาะ Linux อันนี้เป็นการเรียกใช้ system call โดยตรง แต่ข้อเสียคือ number ของ system call ที่เรียกใช้จะขึ้นอยู่กับ OS ที่เป็น unix
#include <unistd.h>#include <sys/syscall.h>int main(void) { syscall(SYS_write, 1, "hello, world!\n", 14); return 0;}
พิมพ์คำสั่ง bc ตามด้วยชื่อไฟล์ lab1.c
C:\PRJ\bc lab1.cพิมพ์โค๊ดภาษา C ลงไป
#include <stdio.h>int main(){ printf("Hello World!"); return 0;}กด ALT-F9 เพื่อ COMPILE
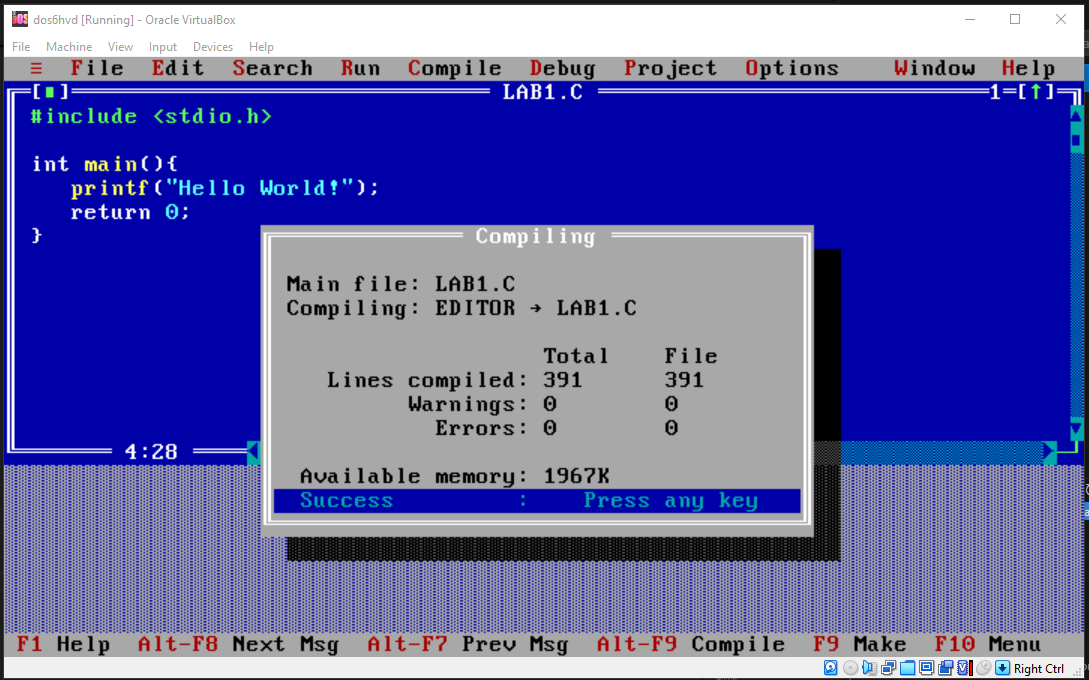
กด F9 เพื่อ Make
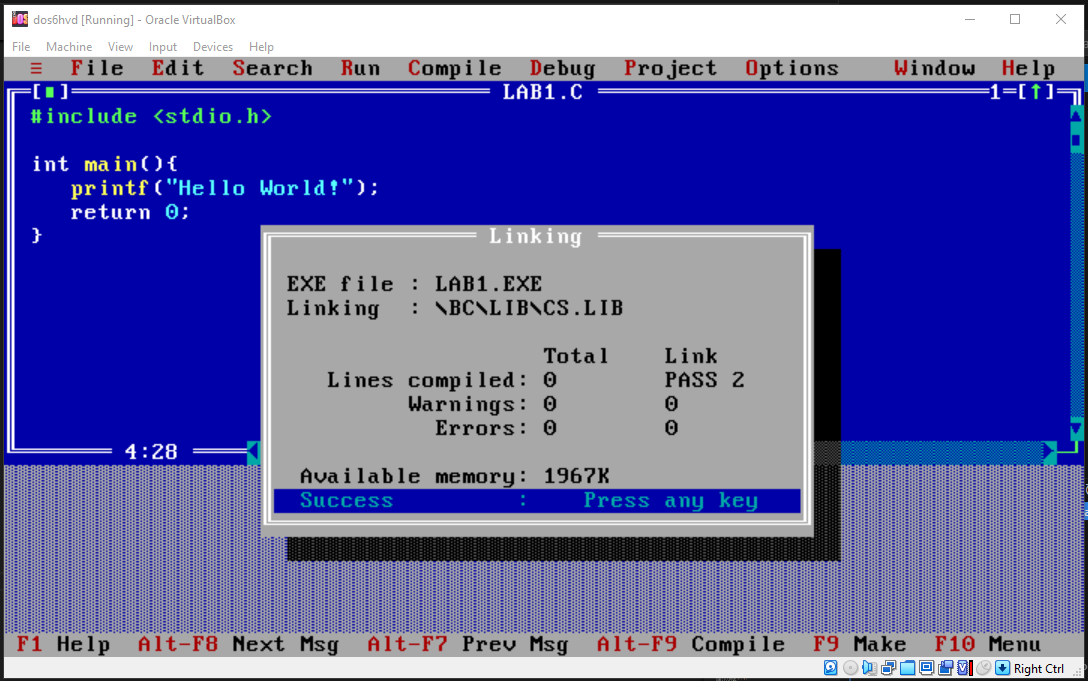
กด ALT-F แล้วไปที่ Dos Shell
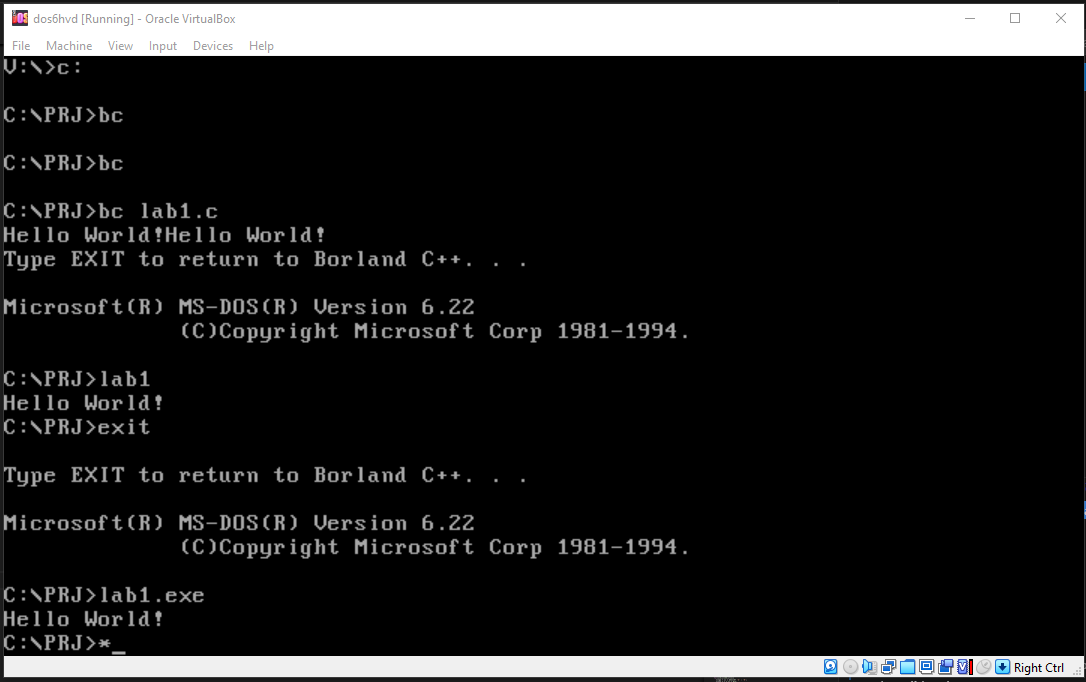
กด Exit เพื่อกลับไป Borland Compiler
ฟังก์ชั่น 2
#include <stdio.h>int main(){ asm { mov ah, 0x2 // ใช้ function 2 ส่งอักขระไปยังจอภาพ mov dl, 'a' // ส่งตัวอักษร ‘a’ ไปจอภาพ int 21h } return 0;}ฟังก์ชั่น 9
#include <stdio.h>int main(){
   char far* greetings = “Hello World!$”;   asm {        lds dx, greetings // ส่งข้อความไปยังจอภาพ        mov ah, 0x9        // ใช้ฟังก์ชั่น 9        int 21h   }   return 0;}
#include <stdio.h>int main(){ asm { mov ah,0x9 //ฟังก์ชั่น 9 พิมพ์ตัวอักษร mov al,'b' // ตัวอักษร b mov bh,0x0 // mov bl,0xcc // สีของตัวอักษร mov cx,10 //จำนวนตัวอักษร int 10h } return 0;}
#include <stdio.h>#include <dos.h>#include <bios.h>#include <conio.h>void far interrupt (*oldint_8h)(void);void far interrupt timer_hook(void);int m=0;int t=0;int active=0;char far* vga = (char far*)0xB8000000; // แสดงผลออกการ์ดจอvoid far interrupt timer_hook(void){ int i; if(active==1){ (*oldint_8h)(); return; } t++; m++; if(t>10){ active = 1; t = 0; for(i=0;i<200;i+=2){ *(vga + i) = m%2==0? 'A' : 'B'; *(vga + i + 1) = 0x7; } active=0; } (*oldint_8h)();}int main(void){ int ch; asm { mov ax, 0x3; int 10h } oldint_8h = getvect(0x8); setvect(0x8, timer_hook); while(ch!='z'){ ch = getch(); putch(ch); } setvect(0x8, oldint_8h); asm{ mov ah,0 mov al,3 int 10h } return 0;}ตามปกติ assembly จะต้องขึ้นต้นด้วย
section .text The .text section is where the executable code resides, such as instructions for the processor to execute. Assemblers and linkers treat this section as the code segment.section .text global _startsection .datasection .datasection .bsssection .bssbuffer resb 256 ; Reserve 256 bytes for a buffercounter resd 1 ; Reserve 1 double word (4 bytes) for a countersection .text ดังนั้น nasm จะไปสนใจ global _start เลยglobal _startglobal Directive:
_start) is something that can be accessed by external files, like the linker. It essentially makes the _start label a global symbol._label Label:
_start is commonly used as the entry point of an assembly program. It’s where the execution begins. By convention, when you create an assembly program, you define this label, and the linker expects it.global _start_start: mov eax, 1 mov ebx, 42 sub ebx, 29 int 0x80exit โดยการ assign 1 ให้กับ register eaxexit นี้จะ return ค่าอะไรออกมา ซึ่ง return 42 ออกมาsub คือการลบค่า ดังนั้น sub ebx, 29 จะได้ 13 เป็นค่าที่ return ออกมาint 0x80 เป็นการเรียกใช้ software interrupt ดังนั้น kernel จึงจะอ่านค่าจาก eax และ ebxใช้ nasm ในการคอมไพล์
nasm -f elf32 ex1.asm -o ex1.onasm เป็นตัวแปลงภาษา assembly (human-readable low-level instructions) into machine code-f elf32 This specifies the output format of the object file as 32-bit ELF (Executable and Linkable Format). ELF is commonly used on Linux systems.ex1.asm This is the input file, which contains your assembly code.-o ex1.o This specifies the output file name as ex1.o, the object file that will be generatedld -m elf_i386 ex1.o -o ex1ld: Invokes the linker to combine the object file and any necessary libraries into a single executable file.
-m elf_i386: Specifies the target as 32-bit ELF format (important for 32-bit programs). If you’re on a 64-bit system, this ensures compatibility for running 32-bit code.
ex1.o: The input object file created by NASM during the assembly step.
-o ex1: Specifies the name of the final output executable (ex1).
./ex1echo $?Real Mode:
Used by the BIOS and initial stages of bootloaders.
Limited to 1 MB of memory and doesn’t support advanced features like virtual memory.
If you’re writing assembly for bare-metal (like bootloaders or OS kernels before transitioning to protected mode), you’ll be working in real mode.
Protected Mode:
Linux and most modern operating systems use protected mode for their normal operation.
Linux assembly programs use protected mode features, meaning you have access to 32-bit or 64-bit registers and advanced memory management.
To run assembly on Linux, you typically interact with the operating system through system calls, which are executed in protected mode.
| System Call | Purpose |
|---|---|
read | Reads data from a file descriptor. |
write | Writes data to a file descriptor. |
open | Opens a file and returns a file descriptor. |
close | Closes an open file descriptor. |
fork | Creates a new process. |
execve | Executes a program. |
exit | Terminates a process. |
wait | Waits for child process termination. |
mmap | Maps files or devices into memory. |
brk | Changes the memory allocation of a process. |
ioctl | Manipulates I/O device parameters. |
socket | Creates a socket. |
bind | Assigns an address to a socket. |
listen | Listens for socket connections. |
accept | Accepts a socket connection. |